How To Do Your Nails At Home On A Budget
- Mary Ann

- Jun 22, 2025
- 5 min read
Updated: Jul 3, 2025
A step by step guide as well as tips, tricks and product recommendations for you to achieve the perfect at-home manicure for a fraction of the price.
Disclaimer: I am not a nail technician, I am just someone who loves painting their nails and has been doing my own on a regular basis for the last 5 years. This post contains affiliate links that help support this blog if you choose to use them :)
Bellow you will find the supplies and steps you need to do your nails at home like a pro! If you've ever wondered how to get the perfect manicure at home or how to save a few hard earned dollars on your nails, your answers should be right here!
This manicure should last over a week and is using your standard nail polish, not gel polish or acrylic.
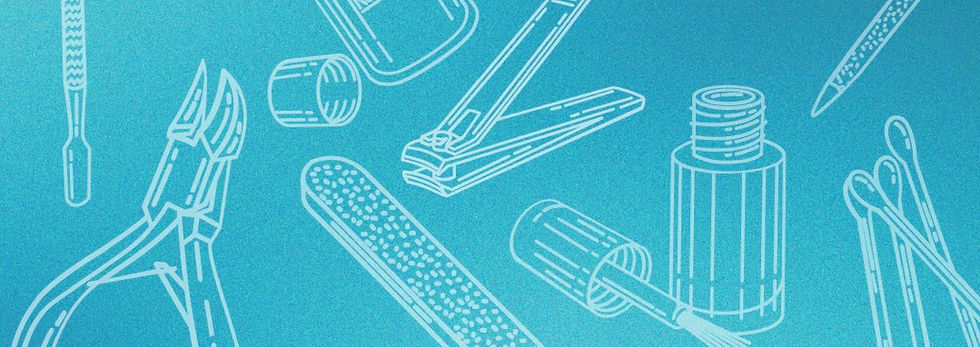
What You Will Need To Do Your Nails At Home
nail polish remover
Cotton balls
Q tips
Cuticle dissolver and/or cuticle trimmer *
Cuticle pusher *
Nail clippers
Glass nail file
Base coat nail polish
Colour coat nail polish
Topper (optional, personal preference) *
Top coat nail polish
At least 2 hours of your time
*Not absolutely necessary but will give you a nicer result
Steps
Prepping 🫧
First we want to prepare, making sure we have clean and tidy nails to help them look nicer for longer.
Start by washing your hands with soap and water. Then dry your hands.
Using your nail polish remover and cotton balls, remove any existing nail polish or oils on your nails.
Tip: If removing nail polish, once one side of the cotton but is soiled, try peeling the cotton ball open to find a clean area that is already soaked with remover. You may be able to do this a few times to save the amount of cotton balls used as most are made of a rolled up strip of cotton.
Using a Q tip, apply cuticle dissolver and work into the area applying light pressure. Wash or rinse your hands again after.
Push back your cuticles gently with a cuticle pusher. Pushing your cuticles back should not hurt. If it does, you may need to use less force or push back in smaller sections.
If you have excess cuticle left now (it might look like folded and flappy dead, hard skin) you can either ignore it and move on (it’s really no big deal), apply cuticle dissolver again like in step 3, or try trimming the dead skin with cuticle clippers. Be very careful, very slow and make sure your tools are clean. Only take off a very small amount at a time. You should only be taking off hard flaps of skin. If it’s soft, do not trim it, instead just smooth over with your thumb and move to the next step to avoid injury.
Shaping 🗿
There are so many ways to shape your nails depending on how long your nails are and what shape you are hoping for. I usually aim for a rounded and natural nail when shorter, oval when medium and almond when longer but this all personal preference. If you’re not too sure, pick a more square shape now and try a rounded shape later! Rounded shapes can be harder and take a bit more time to get right.
Use your glass nail file to trim down to your desired length. This will minimise breaking compared to clippers.
Shape your nails! As I mentioned before, there are so many ways you can go about shaping and this post was getting waaay too long. Checkout this post (coming soon) for an in-depth guide on how to shape your nails!
Base coat 💪
A good base coat will help protect your nails from staining but will never fully prevent it with darker and more vibrant colours. A good base coat will also make your manicure last longer and minimise the look of ridges you might naturally have on your nails.
Apply one thin layer of base coat polish.
Wait to until dry-ish. You should be able to touch it with your finger and not get any polish stuck to it. At the very least it should feel slightly tacky.
Tip: waiting until fully dry will give the best results but increases the time your at home manicure will take.
If you would like an in-depth guide on nail polish application, check out this article for tips to get the perfect finish and long lasting manicure!
Nail Polish 🌈
This is the most fun part, choose your colour and get it on your nails!
Apply your first thin coat of polish and wait to dry.
Apply your second thin coat of polish and wait to dry again.
Now for your third and usually your final coat. This one can be a little thicker than the others to get a nice even, glossy finish.
If your nail polish is still looking too thin and you can see your natural nail through your layers of nail polish, continue adding coats, remembering to let each layer dry. Two to four coats in total of your colour nail polish is usually ideal.
Tip: less expensive and lighter coloured nail polishes might need more coats to achieve full opacity. If it takes more than 4 coats, try a similar colour in a different brand of nail polish or try a slightly darker shade.
Clean up any nail polish on your skin by using nail polish remover and a q tip.
Tip: if you dent your polish while it’s still wet, use some saliva (more than you think) on your finger and very gently move the polish back to where it should be and let dry.
Top coat 💎
This is where we lock in our manicure and make our nails super strong. We can also play with Toppers here. Toppers are usually a clear base with sparkly or interesting specks in it to give your nails a little more oomph! If you chose to use a Topper you still need to apply a Top Coat over the top of it to achieve the perfect finish.
If using a Topper, apply one thin coat and let dry. If not, ignore this step.
Apply your top coat. This coat can be thicker and should cover your entire nail.
Tip: If you don't love the look of a glossy nail, try a matte top coat like the one I have listed below in "Shop Supplies".
Do a final cleanup pass using a Qtip and nail polish remover to remove any remaining polish from your skin.
Wait until your nails are fully dry before using your hands for anything.
You are now done!
Following these steps your manicure should last around 7-14 days before your nail starts growing out again. The more gentle you are with your nails in this time, the longer the polish will last. This means trying to not use your nails to pick, gouge or scrape anything to avoid chipping and peeling; or worse still, damaging your nails.
Shop Supplies 🛍️
nail polish remover https://amzn.to/4kS3bas
Cotton balls https://amzn.to/4071NrT
Q tips https://amzn.to/4n6fbX0
Cuticle dissolver and/or cuticle trimmer https://amzn.to/4kTOJhZ and https://amzn.to/43YGVEl
Cuticle pusher * https://amzn.to/45YqTwR
Nail clippers https://amzn.to/4kGSMxZ
Glass nail file https://amzn.to/3HIexPu
Base coat nail polish https://amzn.to/3HIexPu or https://amzn.to/3FZYwUw
Colour coat nail polish https://amzn.to/3FZYwUw or https://amzn.to/4k3YyZG or https://amzn.to/4k3YyZG or https://amzn.to/4n3fEcv
Topper (optional, personal preference) https://amzn.to/3SV7sgY or https://amzn.to/4e3Yh7o
Top coat nail polish https://amzn.to/43YwWyY for glossy or https://amzn.to/45ruLq4 for matte


![If you’re looking for a new hobby or ideas for the next weekend, head over to maryannmustard.com [link in bio] for free ideas and guides to get you started!
Follow for more 🌻
#blogger #weekendideas #hobbies #blackfriday #maryannmustard](https://scontent-den2-1.cdninstagram.com/v/t51.71878-15/584989849_25628825253420673_6392759089619642163_n.jpg?stp=dst-jpg_e35_tt6&_nc_cat=101&ccb=7-5&_nc_sid=18de74&efg=eyJlZmdfdGFnIjoiQ0xJUFMuYmVzdF9pbWFnZV91cmxnZW4uQzMifQ%3D%3D&_nc_ohc=i3PvzzrsLsQQ7kNvwFyNQ9t&_nc_oc=AdrcyOAws4oJGBRtIRtpChmd8tl6NMyStBivG7iSEY_ddDXcMOlTC1a_ox6cOSmFg2o&_nc_zt=23&_nc_ht=scontent-den2-1.cdninstagram.com&edm=ANo9K5cEAAAA&_nc_gid=TBdkOC00-kFTL247uxeGdA&_nc_tpa=Q5bMBQE21sWP-eQIWGCvmQiZTN7OyTuvKXenJcHsfWGLYVSCxzSigpUvnZraa-q8GAuRe4WEiMidbo3B&oh=00_Af-CHvV17dUABedRV4r7bHKp3Kjw3Ft_sK3k7Zp8NW6fjw&oe=6A2EB726)


Comments